Now that you have configured your LMS and database to accept connections from Zoola, you can complete the setup process by performing a connection test between Zoola and the LMS. This process can be completed through the Zoola block, which you may have already installed on your LMS. If you still need to install the Zoola plugin please visit the Installing the Zoola Analytics Plugins page to guide you through this process.
Now that you have configured your LMS and database to accept connections from Zoola, we can now install the Zoola plugins and complete the connection between the two systems. Zoola includes a suite of plugins that allow access to the ad hoc report building, embeddable reports and time tracking functionality.
. Below is a description of the different plugins and their use.
- Zoola Block (Required) - Enables single sign-on for permissioned users to log into Zoola for Ad Hoc Report building.
- Zoola Reports Block (Required) - Enables the embedding of Reports and Dashboards for learners and other Moodle or Totara users.
- Time Spent Learning (Optional) - Keeps a time-based record of the learner’s activities in courses and activities.
- Time Spent Tracker (Optional) - Tracks the confirmation of a Learner’s continued presence through the use of an alert window—failure to click through the window pauses the time tracking.
- Time Spent Activity Restriction (Optional) - Offers the ability to restrict Learner access to specific course activities until a minimum time is reached, or locks activities after a maximum time is reached.
- Course Time Spent Tracker (Optional) - Provides the Learner with a visualization of how much time has been accumulated into the course, along with options to display required minimum time and maximum time of courses and activities via a course block.
The plugins that are marked as Required are essential for Zoola to work effectively. Plugins marked as Optional can be added at any time and are not essential to the overall operation of Zoola Analytics.
Installation Steps
Before you can install the plugins you will need to download the Zoola plugin suite from the following location.
http://downloads.zoola.io/zoola-bundle-latest.zip
The most common approach for installing plugins is to upload the plugins directly to the LMS (typically via FTP) and then move the plugins to their appropriate plugin location within the Moodle or Totara installation.
The Zoola plugin suite includes six plugins, with three different plugin types (block, local & availability). Each different type of plugin will need to be placed in the appropriate plugin folder. Here are the paths where the different plugins should be installed.
zoola, zoola_reports, course_time_tracker:
Once the plugins have been uploaded to their appropriate folder location go into your Moodle or Totara as a Site Administrator and visit the Site administration > Notifications page. By viewing this page you will complete the installation process.
If you are using plugins from the Moodle Plugin Directory they can also be installed directly through the Moodle or Totara admin page. For more information on this visit https://docs.moodle.org/34/en/Installing_plugins.
Configure Zoola Analytics Plugins
The last step is to configure the plugins so that they complete the connection to Zoola. Depending on the number of plugins that were installed, there are few different configuration steps.
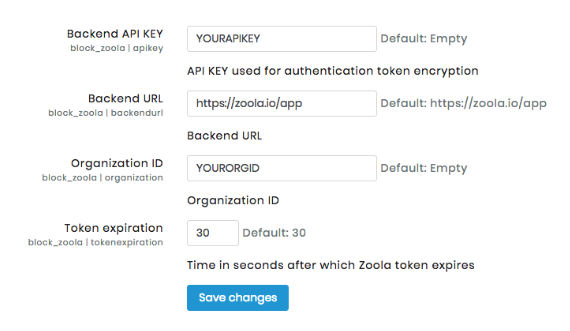
1. Zoola block
The Zoola block provides single sign-on and controls the connection between the Moodle or Totara, and Zoola. This block is essential for connecting to Zoola and is required by the other plugins in the Zoola plugin suite.
To configure the plugin follow these steps:
Visit Site Administration > Plugins > Blocks, and select Manage Blocks as a Site Administrator.Locate the Zoola block to access the configuration settings and enter the following settings.
- Organization ID (received from Lambda Solutions)
- Backend URL ( enter https://zoola.io/app )
- Backend API KEY (received from Lambda Solutions)
- Token expiration (leave as default 30)
2. Time Spent Learning block
The Time Spent Learning plugin allows Zoola to report on user time spent within the Moodle or Totara. To do this the plugin calculates Moodle or Totara, course and activity access times based on information stored within the Moodle or Totara logs. To start using this functionality complete the below steps.
- As a Site Administrator, navigate to Site Administration > Plugins > Local Plugins, and select Time Spent Learning.
- Click the Start Import button to begin automatically importing historical data to the plugin.
- For more information, please visit: https://help.zoola.io/display/ZOOL/Time+Spent+Learning+Plugin
3. Assign Roles for Administrators
Zoola features a number of different roles that can be assigned to your Moodle or Totara, which allows them access and permissions to different features within Zoola.
In order to access Zoola report building features and Moodle or Totara user needs to be assign one of the Zoola roles. This can be done by visiting Site Administration > Users > Assign System Roles as an Site Administrator and assigning the appropriate role to the user. We recommend that ALL Site Administrators have the Zoola Administrator role.
For more on roles, please visit: https://help.zoola.io/display/ZOOL/LMS+Zoola+Roles
4. Add Zoola and Zoola Reports Block to the desired homepage (i.e. Frontpage, Default Dashboard)
The Zoola and Zoola Reports blocks are designed so that they can be placed anywhere within the Moodle or Totara through the blocks section that is present on each page. Reports can be placed on dashboards, within courses or on a user’s profile page, making it easy for the user to quickly access the relevant data.
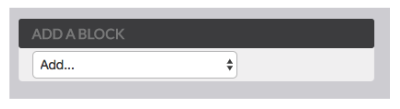
Blocks can typically be added by clicking the “Turn editing on”, “Customize page” or “Blocks editing on” buttons and then selecting the block through the “Add a block” option.
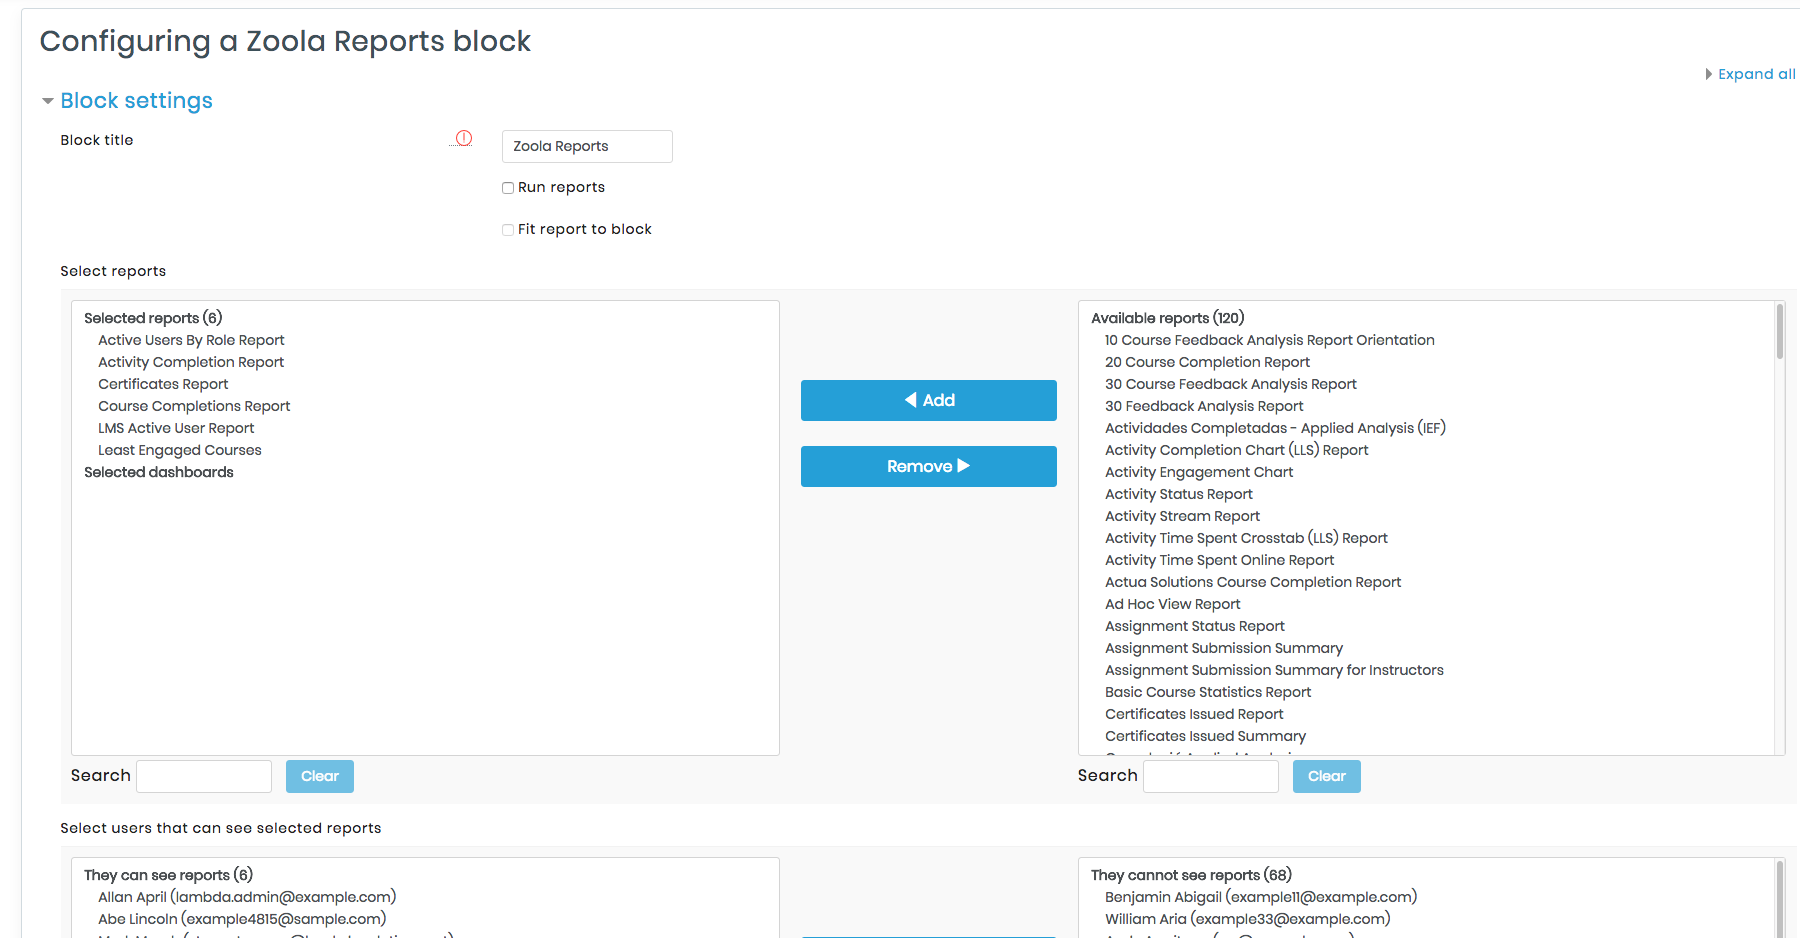
5. Zoola Reports block
The Zoola Reports block allows reports and dashboards created through Zoola Analytics to be embedded directly within the Moodle or Totara.
The block includes a number of options that allow you to select the report, display type and report viewers (individual or cohort/audience). Select the reports you want displayed and then save the settings to have them applied to the block.
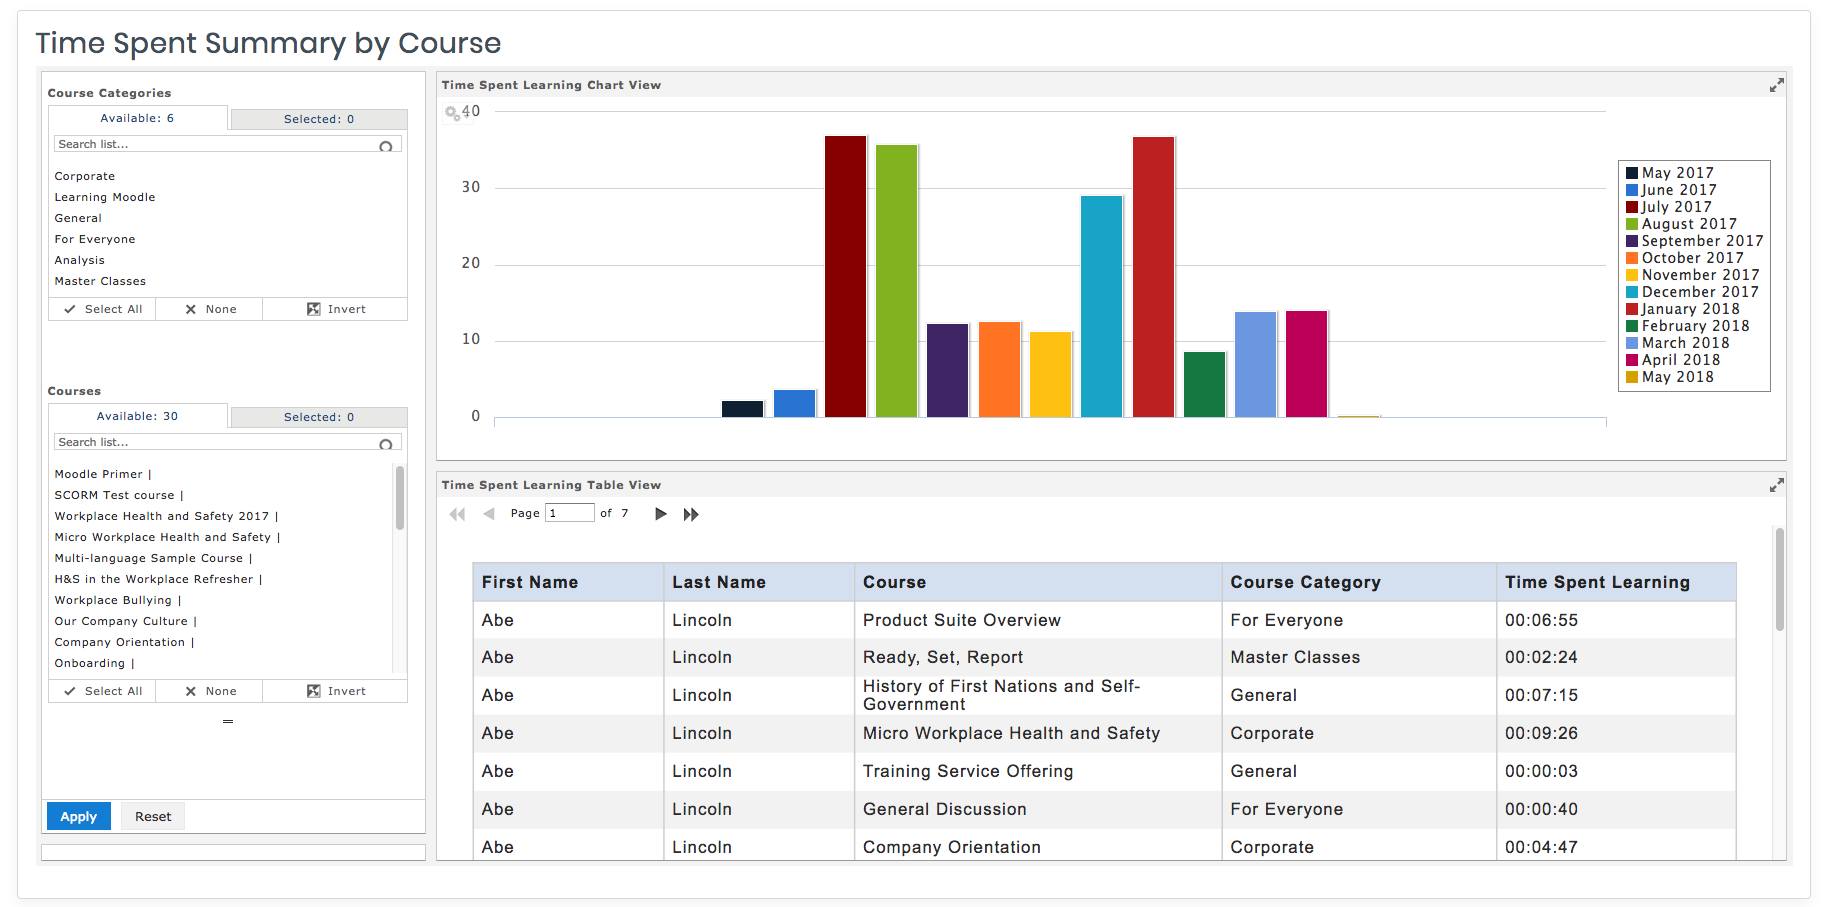
A good report to start with is the “Time Spent Summary by Course” dashboard. This view features time spent by month graph and user time spent breakdown chart. See below.
6. Zoola Reports block
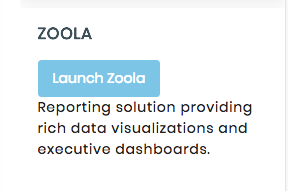
Now that Zoola is configured, the plugins are installed and the blocks have been placed within your Moodle or Totara, Zoola Analytics is fully configured. At this point you can view embedded reports through the Zoola Reports block or access the report building functionality through the “Launch Zoola” button on the the Zoola block.
4. Zoola Connection Test
1. Access Connection Test
Once you have all the Zoola plugins installed, you can complete the Zoola connection by using a connection test feature built into the Zoola block (block_zoola). To access this go to Site Administration > Plugins > Blocks > Zoola > Database settings. This page will allow you to enter your relevant database information into the form and test connectivity between Zoola and your LMS.
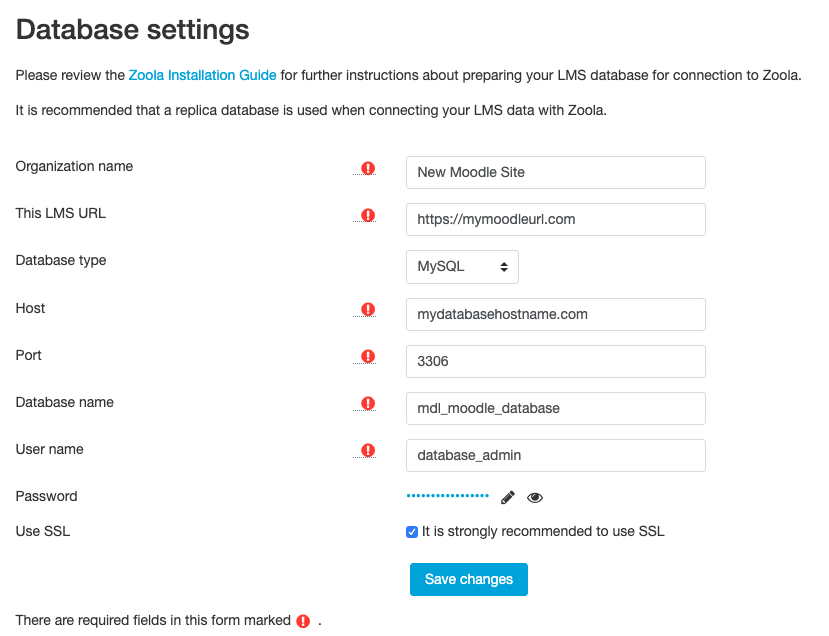
2. Perform Test
Once you have entered all the information click the Test Connection button to perform a connection test between Zoola and your LMS. If the connection test fails you will be presented with an error message. This message will outline some of the possible reasons that a connection could not be established. Some of the common connection issues are:
- Database is not accessible to Zoola - See Step 1 and Step 2 of the configuration guide for more information.
- Database username and/or password is not correct - See Step 3 of the configuration guide for more information.
- SSL not enabled on the connection - See SSL Certificates section and try toggling the Secure Connection setting to True or False depending on its current setting.
If you continue to have problems connecting Zoola to your LMS, please contact Lambda Support, who can perform additional troubleshooting.
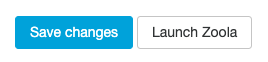
3. Complete Zoola Connection
When the connection test has been completed successfully and Zoola was able to access your LMS information a congratulations message will be displayed at the top of the screen, along with a new Launch Zoola button next to the save changes button.
Now that Zoola has now been connected to your LMS, click the Launch Zoola button to access the ad hoc reporting and chart functionality building. Alternatively, add the Zoola and Zoola reports blocks to your different LMS pages to allow your LMS users access to the different out of the box reports. For more information about the different Zoola plugins visit the Zoola Analytics Plugins page.