When you add a Report that has input controls to a Dashboard, the controls don't appear on the Dashboard until you explicitly add them, one-by-one. The controls can either be added directly to the Dashboard as a dashlet or accessed from the toolbar as a pop-up window. When the Report runs, Dashboard users provide input using the control. Data based on the user input appears in the Dashboard. For example, using the input control, you select "Mexico." The report on the dashboard shows orders from Mexican companies.
To add controls to a Dashboard as a Dashlet, complete the following steps:
In the Filters section of the Dashboard Designer, expand a folder. The available input controls for the Report/View appear.
Drag an Input Control onto the Dashboard Canvas. The input control will become a unique Dashlet.
If required, drag more controls onto the new input control Dashlet. Resize the Dashlets as needed to view all of the input controls.
Click the Save button and select Save Dashboard.
Click the Display button to preview the dashboard.
Use the options to select a value from the values list, and click the Apply button at the bottom of the Dashlet. The data displayed changes, but is not updated in the other reports.
Click to return to the Dashboard Designer.
To rename an input control or filter, complete the following steps:
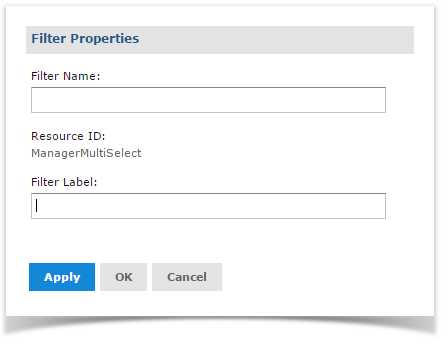
In the Dashboard Designer canvas, right-click the input controls Dashlet and select Properties from the context menu. The FIlter Properties window opens:

Change the text in the Filter Label field.
Click the OK button.
To add input controls as a pop-up window, complete the following steps:
In the Dashboard Designer, click the Properties button to open the Dashboard Properties window.
Select the Show filter dashlet as pop-up option.
Click the OK button.
The input controls Dashlet disappears from the Dashboard, and the Filter button appears on the toolbar. This button is also displayed to end users when viewing the Dashboard.
Hover over the Save icon and select Save Dashboard.
Click the Preview button to preview the Dashboard.
From the preview toolbar, click the Filter button to view the filter pop-up window.
Click the Apply button to apply any input control changes to the Dashboard.
Click the Filter button to close the filter pop-up window.
Click the Preview button to return to the Dashboard Designer.