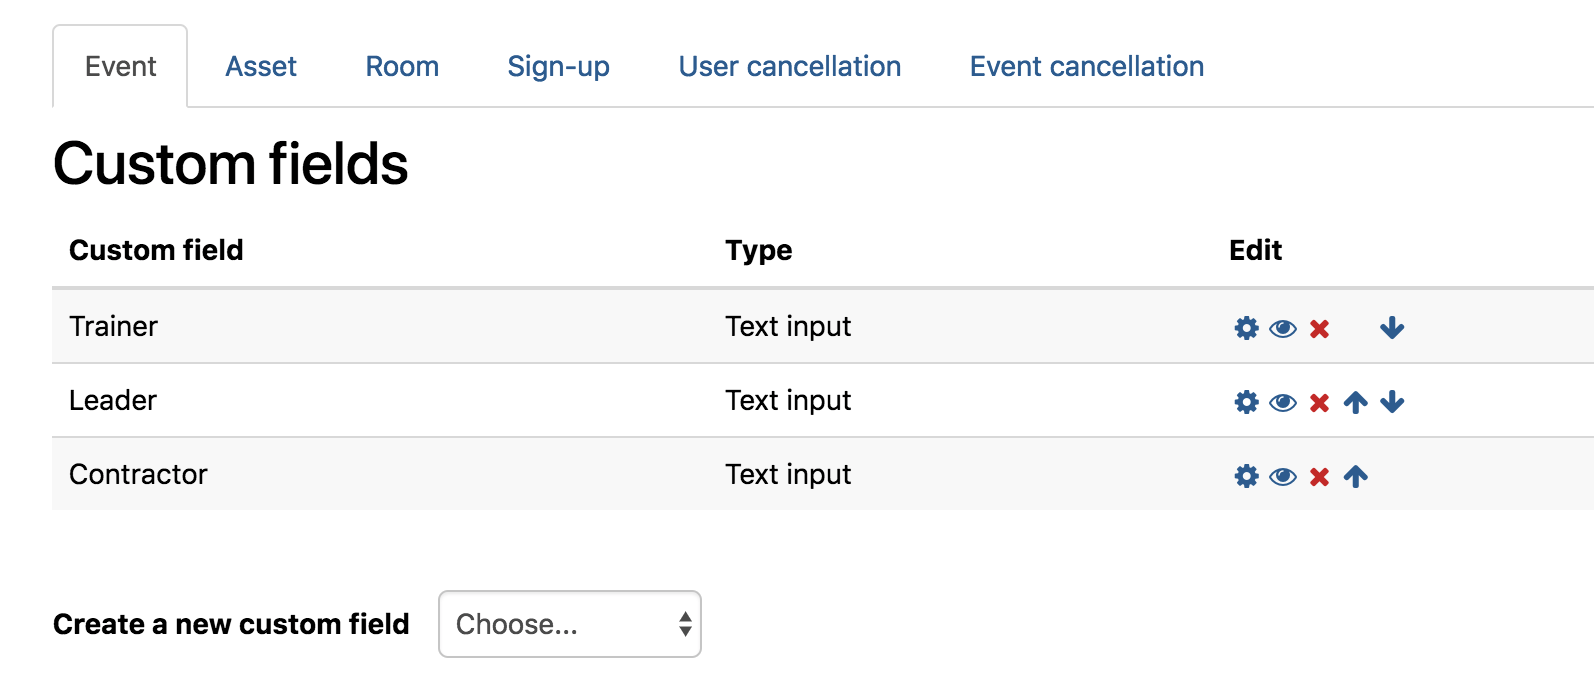
In a similar way that Users and Courses have custom fields, Totara has now included the option to add custom fields to the different screens, resources and assets associated with the Seminar activity. These fields are added by visiting Site Administration › Seminars > Custom Fields within your Totara LMS site. You can then create new custom fields with a variety of different types and across the different areas associated with the Seminar activity (see below). Please note, custom fields and the Seminar activity are only available in Totara 9 and above. Seminars were added in Totara 9 as an enhanced and rebranded version of the Face to Face activity and so this guide will not work for older versions of Totara LMS.
Once you have created the custom fields to use as part of your Seminar sessions, you can start building the Zoola report that will include this information. For the purposes of this case study, we will add a Derived Table to the ##### Data Source, which already includes many of the necessary tables associated with Seminars, sessions and attendance.
To begin, you will need to copy the ##### Data Source from the Public folder into your private organizational folder tree. To copy the ##### Data Source, complete the following steps:
- From the Zoola landing page, select Data Sources > View Existing.
- Locate ####### Data Source, right-click and select Duplicate. This will create a new Data Source directly under the original ###### Data Source with a (1) appended to the end.
Now that you have an editable copy of the ##### Data Source, you can edit it to add the necessary Custom Fields through a Derived Table.
Right-click the ##### Data Source and select Edit. The Edit Data Source page opens.
Underneath the Data Source Design heading, click the Edit with Data Source Designer link. The Data Source Designer opens to the Display tab.
Navigate to the Derived Tables tab.
In the Query ID field, enter the name "der_custom_user_fields" or "der_custom_course_fields" depending on which custom profile field you intend to add.
In the Query field, you will need a add an SQL statement. Use one of the following formulas:
SELECT
mfr.id AS 'room_id',
mfrid1.data AS 'Room Field 1',
mfrid2.data AS 'Room Field 2',
mfrid3.data AS 'Room Field n'
FROM  mdl_facetoface_room mfr
LEFT OUTER JOIN  mdl_facetoface_room_info_data mfrid1 ON (mfr.id=mfrid1.facetofaceroomid AND mfrid1.fieldid=1)
LEFT OUTER JOIN mdl_facetoface_room_info_data mfrid2 ON (mfr.id=mfrid2.facetofaceroomid AND mfrid2.fieldid=2)
LEFT OUTER JOIN  mdl_facetoface_room_info_data mfrid3 ON (mfr.id=mfrid3.facetofaceroomid AND mfrid3.fieldid=3)
. Seminar custom profile fields are only available with Totara 9 and higher, which was when the original Face to Face activity was rebranded as Seminar.
Firstly, you will need to add the custom field