Preparing Your Report
The images, examples, and references throughout this case study assume that you are working with a Zoola Report with the following specifications:
- Data Source: Course Completions
- View Type: Table View
- Columns: Course, Course Category, Name, Date Enrolled, Date Completed, and Status.
- Filters: Course ID (Is One Of), Course Category ID (Is One Of).
However, in order for the SQL and parameters used in this case study to function, your Report must only meet the following criteria:
- Columns: Course, Course Category.
- Filters: Course ID, Course Category ID.
Configuring the Report Filters
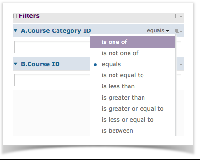
The queries used in this case study require that your Report contain Course Category ID and Course Category ID filters, as shown in the following image: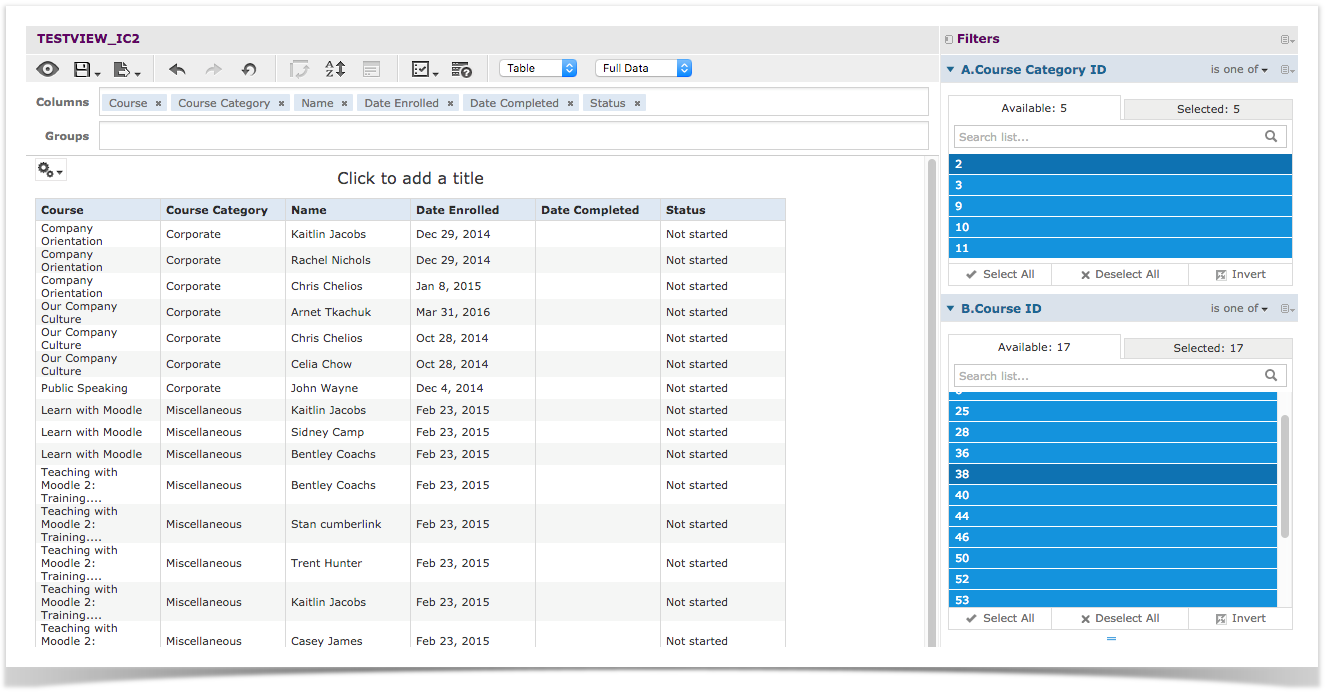
Note that you do not need to include the Course ID and Course Category ID columns in your Table - but you must include them as filters. To include and configure these filters for your Report, complete the following steps:
- From the Repository, open the Ad Hoc View from which your Report was created.
- In the left-hand column of the Ad Hoc Editor, select the Course Category ID measure from the Measures panel.
- Right-click the Course Category ID measure and select Create Filter. The Course Category ID filter appears in the right-hand Filters column.
- Repeat steps 2 and 3 for the Course ID measure.
- From the Filter Title bar, click the Equals selector to expand the Filter Type Options list.
- From the Filter Type Options list, select Is One Of. Do this for both filters.
This filter type allows the user to select any amount of values (ranging from one to all). - For each filter, click the Deselect All button, then select a few values for each filter. These selections will not matter for the final version of this Report, as users will be required to select Input Control values before running the Report. However, it is important that you complete this step—if every filter value is selected, the queries implemented in steps 2 and 3 of the case study will not function as required. Be sure to select some, but not all of the filter values for your Ad Hoc View before you save it as a Report.
- Save your Ad Hoc View and either Create a New Report or Update an Existing Report.
Gathering Filter Parameter IDs
In order to properly map Custom Input Controls to existing filters, you will need to know the specific Parameter IDs of each filter. Both steps 2 and 3 of this case study will require you to enter the Parameter IDs of the Course ID and Course Category ID filters, respectively.
If you are following this case study to the letter, your Parameter IDs should be:
- Course ID: course_id_1
- Course Category ID: course_category_id_1
However, Parameter IDs for filters are generated by combining the table field ID with a number representing the filter (if multiple filters are created from the same field, the suffixes will grow from 1 to 2, and onwards).
To find out the exact Parameter ID of a filter in your Report, complete the following steps:
- Create a new Dashboard by navigated to Create > Dashboard.
- Add the Ad Hoc View of your Report to this Dashboard by selecting it from the Available Content panel.
Once you have added the Ad Hoc View to your Dashboard Canvas, the Filters panel appears, showing the Course ID and Course Category ID filters. - Right-click the Course Category ID filter and select Properties.
- Note the Parameter Name from the Properties window.
- Repeat steps 3 and 4 for the Course ID filter.
Before continuing on to Step 2: Creating the Course Categories Input Control, be sure you have completed the following:
- Created a Report with at least the Course and Course Category fields as columns.
- Added filters to your Report for the Course ID and Course Category ID fields.
- Noted the Parameter IDs for your filters by examining the Properties window for each filter in the Dashboard Designer.