Over the last few Zoola Block releases we have added new report scheduling functionality that allows for Zoola reports to be sent directly from the LMS. There are currently two types of Zoola report scheduling that are available through the LMS, Zoola Reports Block Scheduling and Event Scheduling. In this case study we will explain how the Event Scheduling functionality works and is used.
The Zoola Report Block Event Scheduler is a Site admin feature designed to allow for reports and messages to be sent by specific events happen within the LMS. This allows for students to receive a notification and report with their grades when they complete a course, or provide a teacher with a course enrolment report when a new student or cohort is enrolled into a course. This functionality helps to automate the movement of information between the LMS and its users, making it easier for users to get access to the information that they need to.
The following guide will outline all the steps necessary to create a new event schedule through the Zoola Report Block functionality.
Accessing the Event Scheduler settings
The Zoola Reports Block Event Scheduler configuration pages can be accessed by visiting Site Administration > Plugins > Blocks > Zoola Reports > Event Scheduler Settings within the LMS.
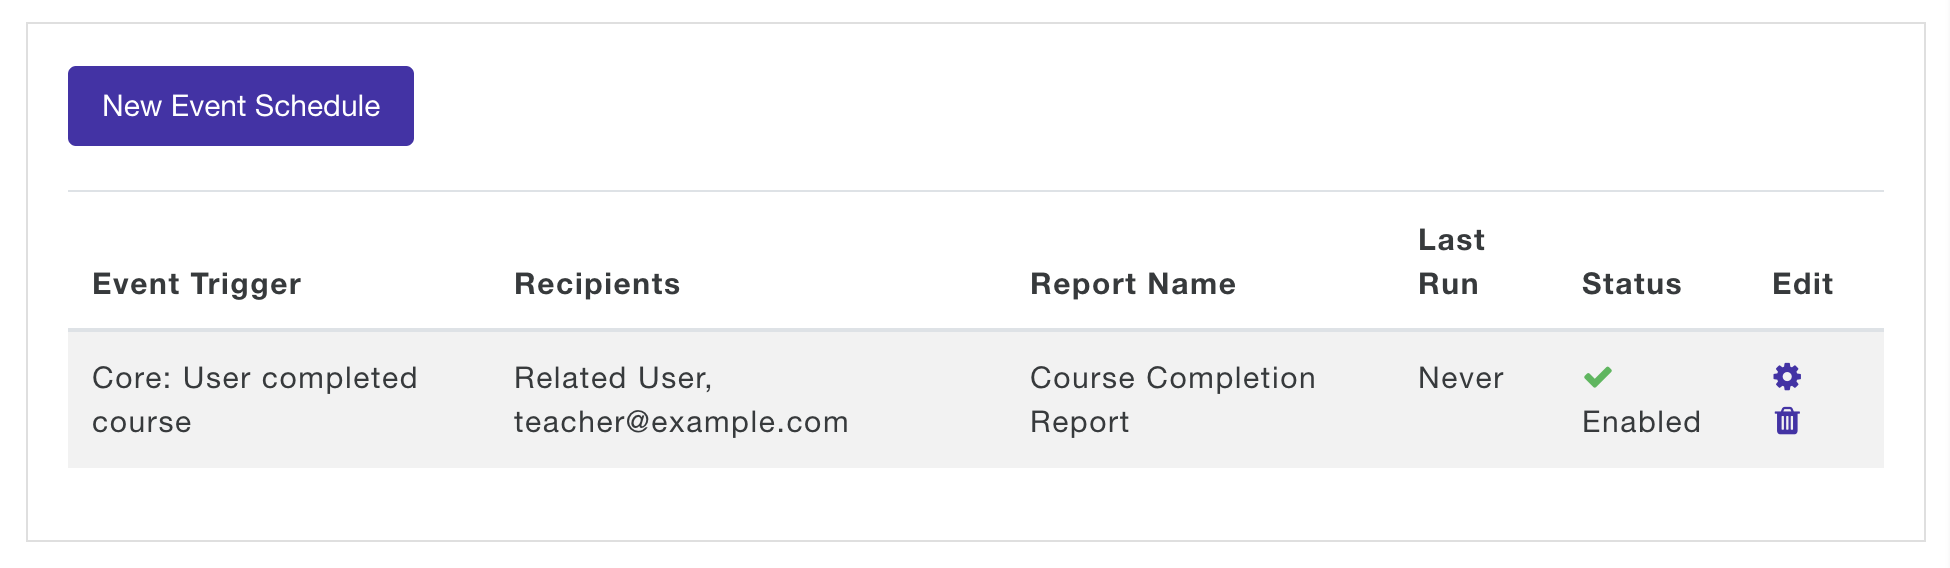
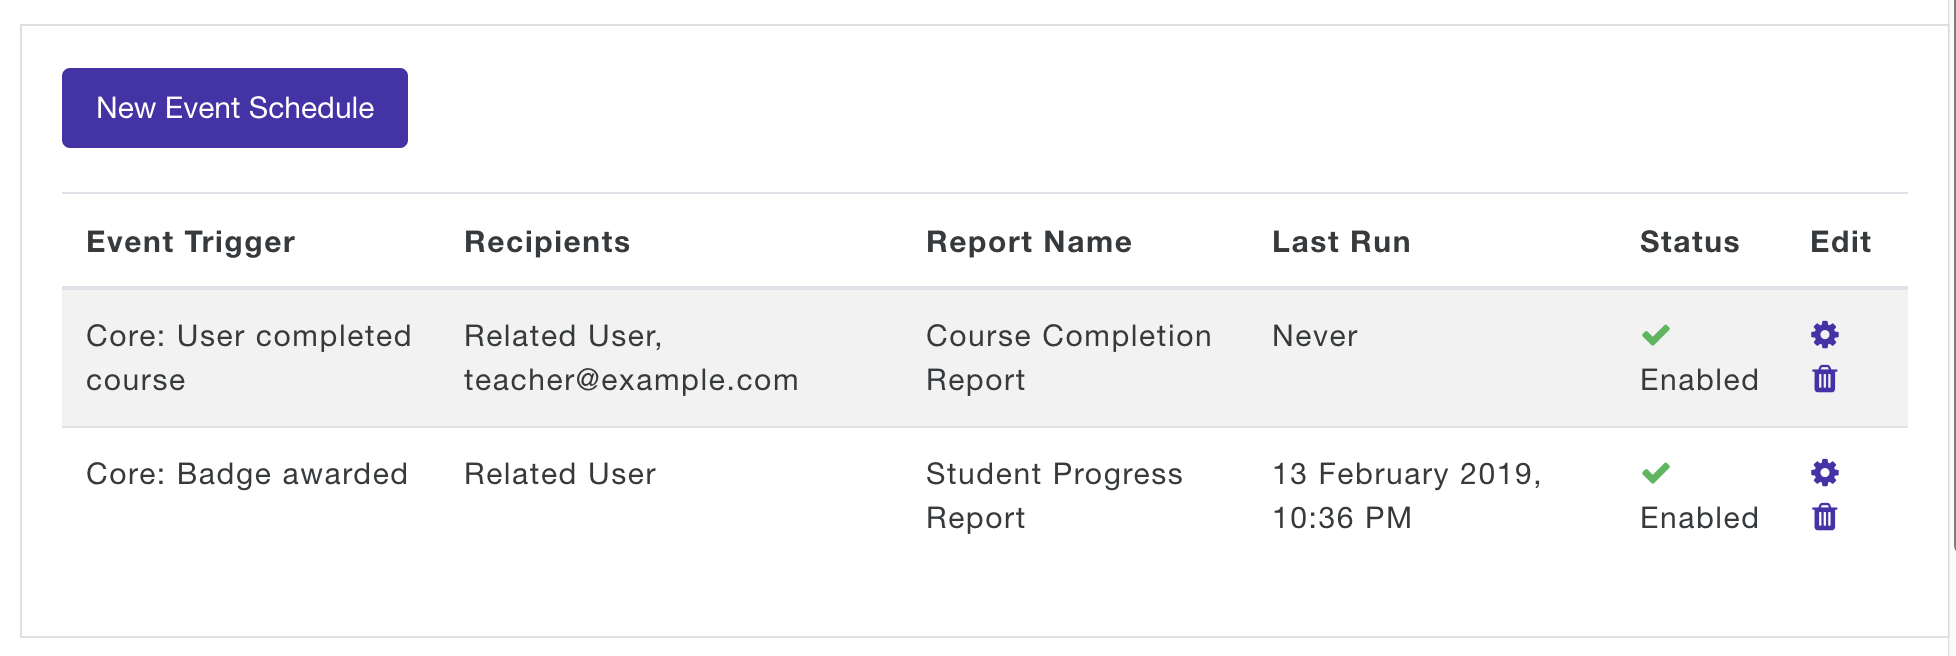
Once you have accessed the Event Scheduler Setting you will see an Event Schedules overview screen that displays all of the event schedules that are currently configured for the site. This screen shows the schedules that have been created, their current status and the last time the schedule was executed, as well as a button that allows you to create new schedules. You can also use the ![]() and
and ![]() to edit and delete existing schedules.
to edit and delete existing schedules.
If you have not visited this page before, there will not be any event schedules available and the only option available will be to create a new event schedule. To do this click on the New Event Schedule button.
Creating a new Event Schedule
To create a new event schedule, you will need to click on the New Event Schedule button. This button will take you to the Event Schedule creation screen, where you can begin the schedule creation process.
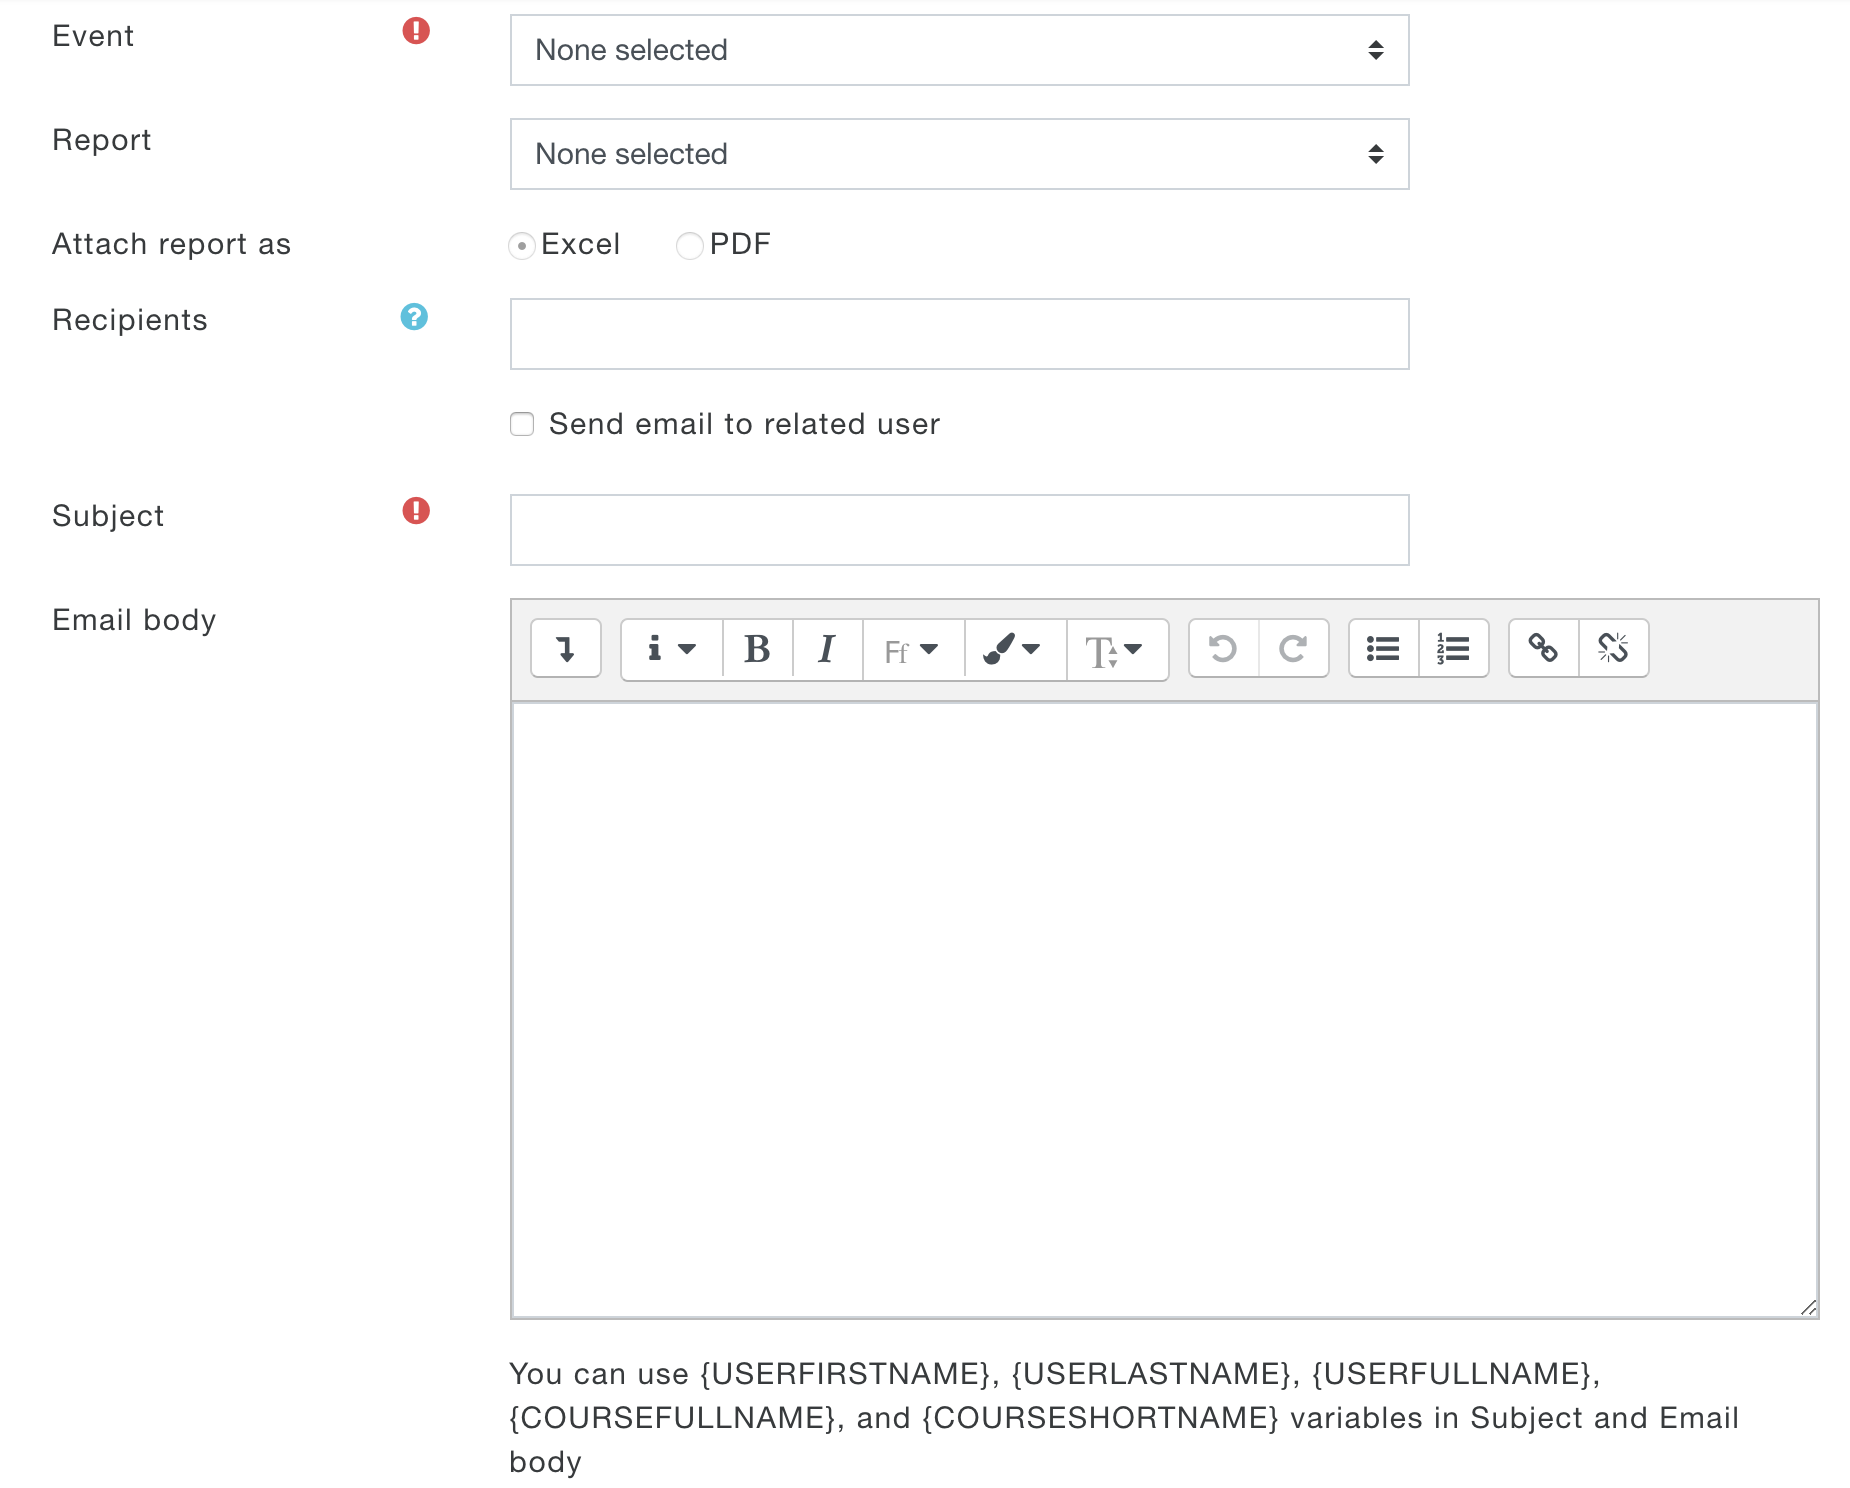
The Event Schedule creation screen will allow you to define the event schedule you want to create, through a series of schedule options. Below is an explanation of the different fields used within a schedule.
Event
The Event dropdown option allows you to select the type of event that you would like to trigger the Event Schedule. The events that are available can be selected from the Event dropdown menu and are shown in the screenshot below.

The event type that is selected will determine when a particular schedule is triggered. For example, if the Core: Badge awarded event is selected and a schedule is created, a report and/or message will be sent whenever a badge is issued to a user within the LMS.
All event types, available through the event dropdown, allow for a simple event selection i.e. you only need to select the event, nothing further is required. The exception to this is the Core: User completed course option, which includes additional course and group filtering options.
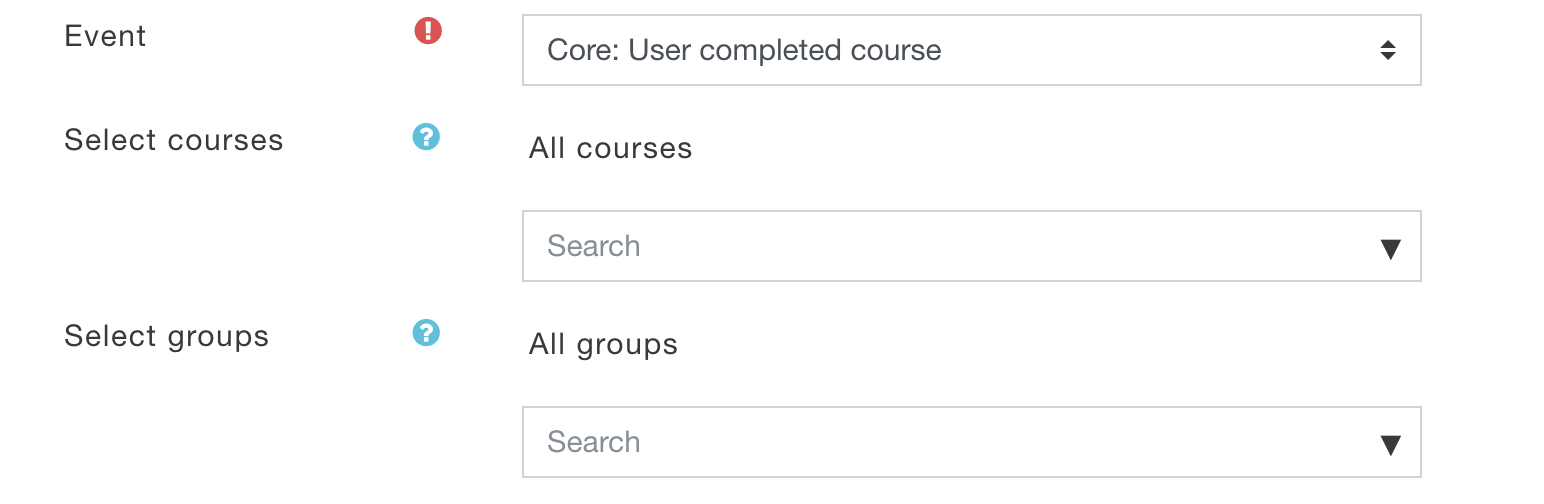
This functionality allows for specific courses and groups to be selected as part of the schedule so that reports and messages are only sent when course completion events occur for these particular courses. To restrict course completions events to specific courses or groups use the “Select courses” and “Select groups” options to select the appropriate courses/groups. Multiple courses/groups can be selected through these options allowing for the a schedule to trigger based on a selection of courses/groups. Both options will only show courses that are available within the LMS. The groups options are restricted so that it will only show the groups based on the courses that have been selected.
Report
The Report option allows you to select the report that should be sent when an event trigger occurs e.g. Badge awarded, Course Completed, etc. Only reports that have been created by Zoola/LMS users are available for selection. Public or Out of the Box reports are not available, although they can be duplicated within Zoola if they re required.
Report Versions
In addition to standard Reports, the Event Scheduler can be used to send Report Versions. A Report Version is a report that has it’s filters pre-selected and saved allowing for quick access to a specific set of report data, without having to apply filters every time the report is run. To create a Report Version, run a report within Zoola (Reports > View Existing) and before applying the filters select the Save option (see below).
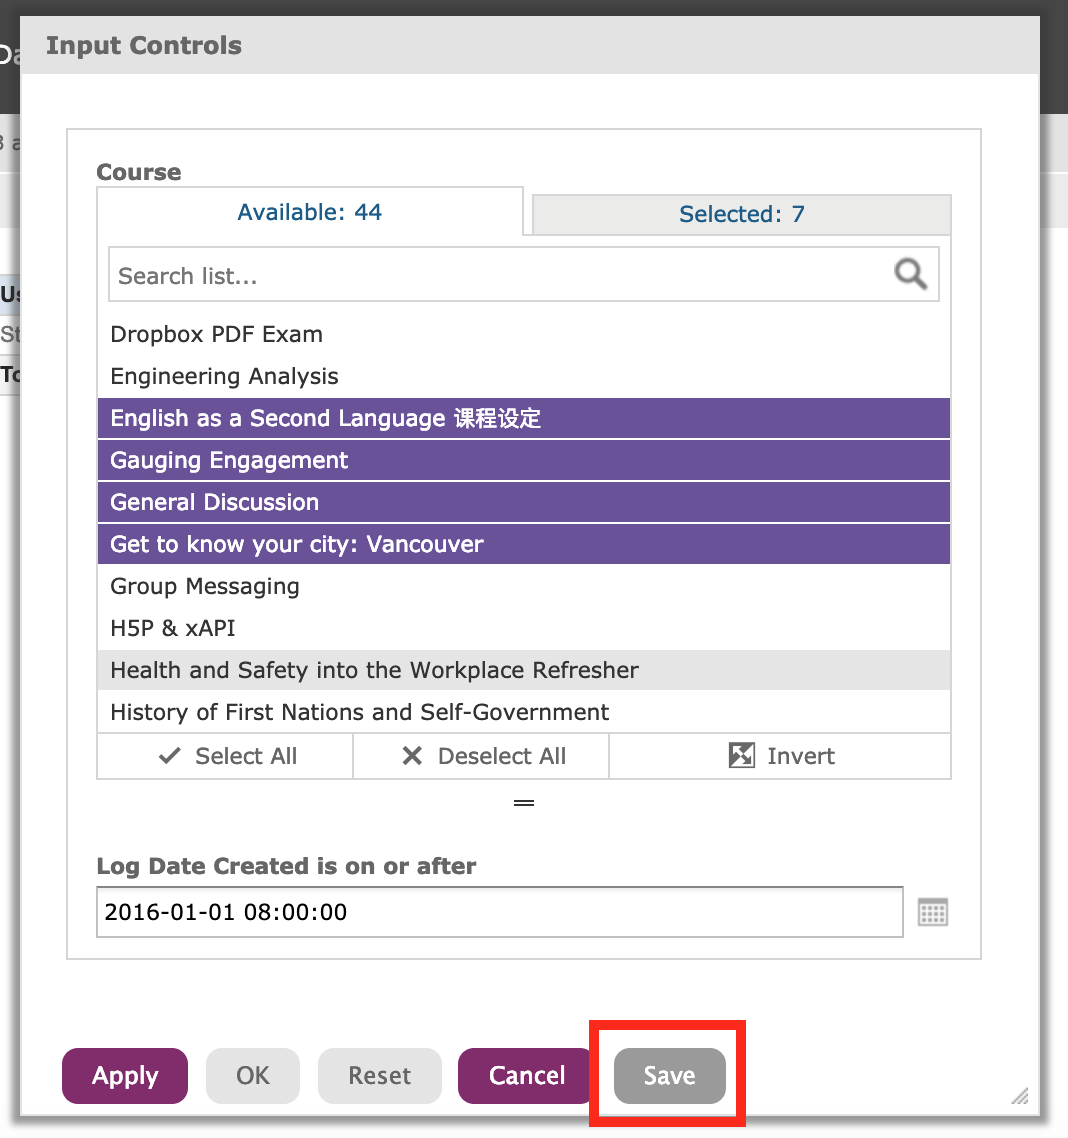
Enter a name into the prompt and save the Report Version. This artifact will now be available through the Event Scheduler. You can identify Report versions within the Report dropdown option by looking for report that have "/" in their name (see below).

This functionality is particularly useful when you want to send a report via the Event Scheduler that is pre-filtered with the course information. By restricting the report to the appropriate course and having the event schedule trigger based on a specific course, using the Core: User completed course, you can have an event schedule restricted to trigger and send information based on specific course information.
Attach report as
Select the report file format that you would delivered through the event triggered email. If the “None selected” Report option has been selected these options will be greyed out and not selectable.
Recipients
The recipients option allows for you to define all the recipients that should receive an email when an event schedule is triggered. The recipients that you add to this text box will receive an email every time that the schedule is triggered.
Send email to related user
In addition to the Recipients input, you can also select the “Send email to related user” option. By enabling this option, the user that is associated with the event will also receive an email. For example, if a student completes a course and the “Core: User completed course” (course completion) event is triggered an email will be sent to any users defined in the Recipients text box, as well as the student who completed the course. This feature is particularly useful when you want to send grade reports, course completion reports or completion certificates, for example, automatically to students at the moment they complete the course.
To successfully achieve this behaviour (student receives their grade report, showing only their grades) you will need to make sure that the report used in the event schedule has a Data Source Security File attached. Typically, the User Security File should be used in these scenarios, so that the schedule report is restricted specifically to the user that triggered the event (completed the course). You can find more information about using Security Files here.
Message
Use the Subject and Email body options to create the email message content that will be sent every time the schedule is triggered.
Message Variables
To help further customize the Subject and Email body, the Event Scheduler includes a number of variables which can be used to add dynamic information to the different text ares. The variables allow for information such as User Full Name or Course Short name to be added to the message contents, based the user the event that is triggered.
Once you have entered all of these settings the event schedule has been successfully configured. You will now be taken back to the Event Scheduler Settings page.
At this point, the schedule has been configured and will be triggered when the appropriate conditions are met. The Event Schedule settings page will display all the schedules that have been created, their current status and the last time it was run. If there are any issues with the schedule the specific event schedule will identify the cause of the schedule not triggering.